If you sell anything where the price depends on a customer’s unique input, you have likely hit the Shopify Wall.
Maybe you sell custom-length fabric, engraved jewelry, or industrial signage. Shopify is a masterpiece for selling t-shirts, but it is a nightmare for selling products by the square inch. Traditionally, merchants tried to force these options into variants, resulting in what is known as the Variant Graveyard, a product admin so bloated with one-off configurations that the site slows down and the fulfillment team loses their minds.
The Direct Answer: The No-Variant Strategy
You can add custom pricing on Shopify without creating a pile of variants by using a dynamic calculator that saves selections as line-item properties. This modern approach keeps your product catalog clean, avoids Shopify’s 100-variant limit or the newer 2,000 limit, and ensures the checkout experience feels native. By using the Apippa Custom Price Calculator, you are not creating new products; you are simply attaching instructions and a price adjustment to the parent product.
Why the No-Variant Flow is a Game Changer
Before we dive into the setup, let’s look at why the old way of creating variants on the fly is dying.
Feature | The Old Way (Auto-Generated Variants) | The New Way (Line-Item Properties) |
Catalog Health | Cluttered with thousands of ghost variants. | Stays 100% clean. Only the parent product exists. |
Speed | Slow; the system has to create a product. | Instant. Add-to-cart is immediate. |
Abandoned Carts | Often break when ghost variants are deleted. | Stable. The cart links to the permanent parent product. |
Limits | You hit Shopify’s API rate limits quickly. | Unlimited. No limits on configurations. |
How to Set Up Custom Pricing: A Step-by-Step Checklist
Setting this up with Apippa is straightforward, but the magic is in how you structure your logic.
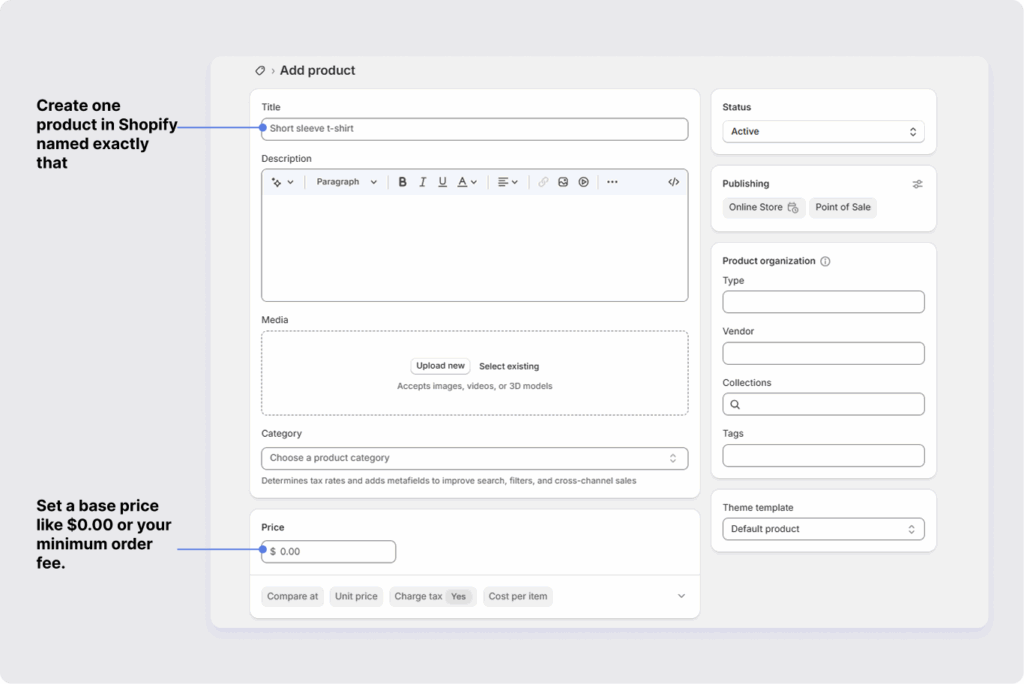
1. Choose Your Parent Product
Pick the base product that will act as the container for all custom orders. For example, if you sell Custom Vinyl Banners, create one product in Shopify named exactly that. Set a base price like
$0.00 or your minimum order fee.
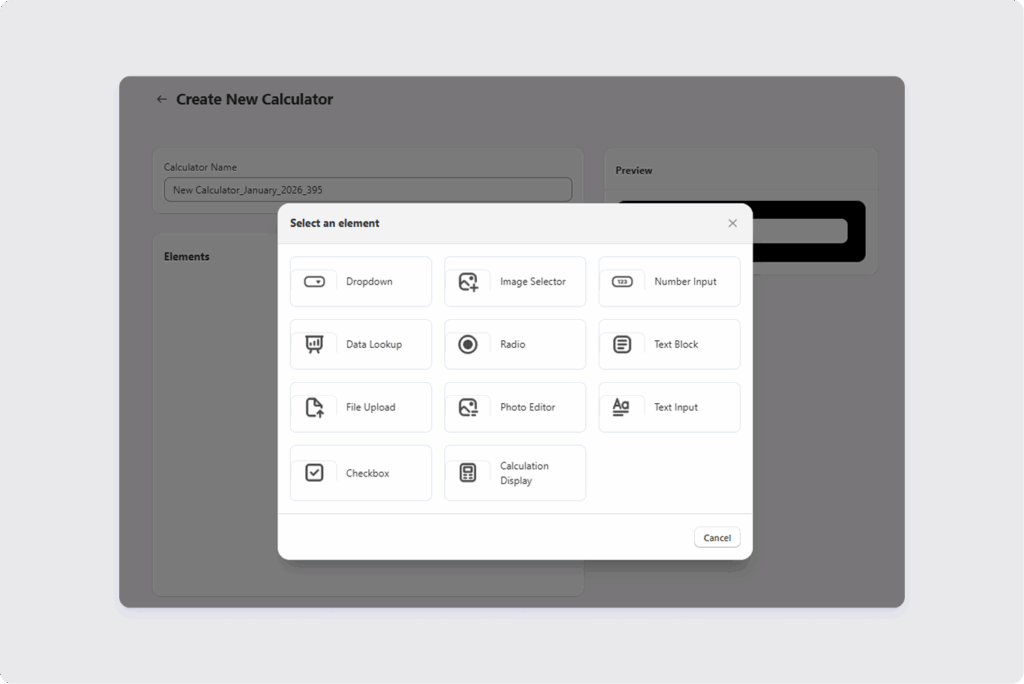
2. Build Your Inputs
In the Apippa dashboard, you will create the fields your customer interacts with.
- Measurements: Number fields for Width, Height, or Depth.
- Options: Dropdowns for Material (Vinyl vs. Mesh) or Finish (Grommets vs. Hems).
- Add-ons: Checkboxes for Rush Production or Gift Wrapping.
Pro Tip: Name these fields exactly how you want them to appear on the invoice. Instead of Field_1, use Finished Width (Inches).
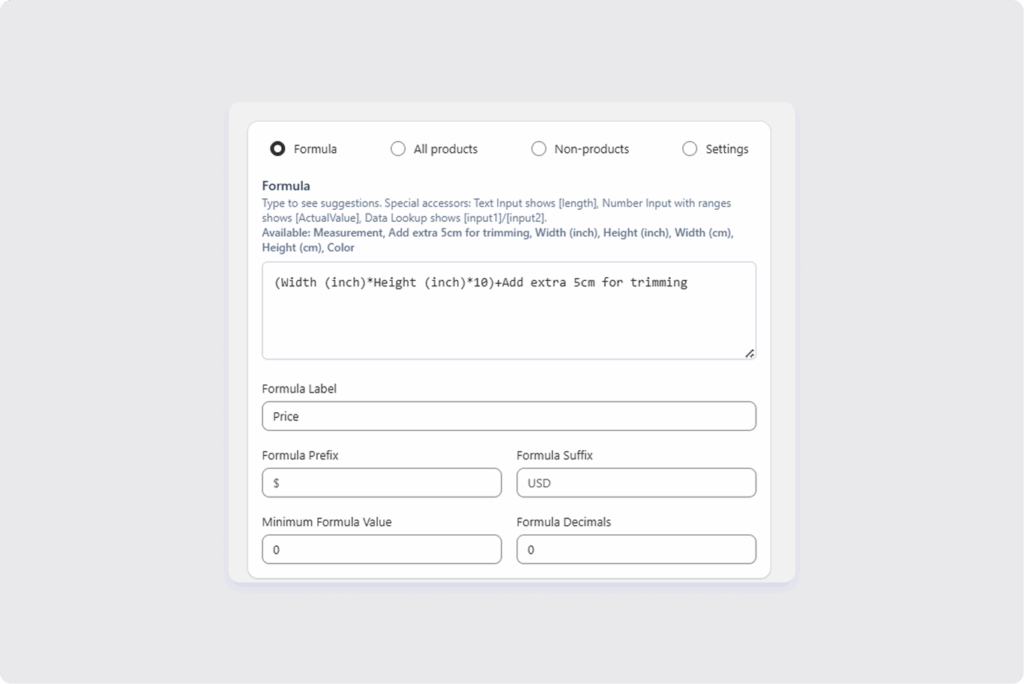
3. Layer in the Pricing Logic
This is where you tell the calculator how to do the math. Common formulas include:
- Area-Based: Width x Height x Price Per Square Inch
- Tiered Pricing: If Quantity is greater than 50, reduce price by 10 percent.
- Base + Add-ons: Base Price + Engraving Fee + Material Markup
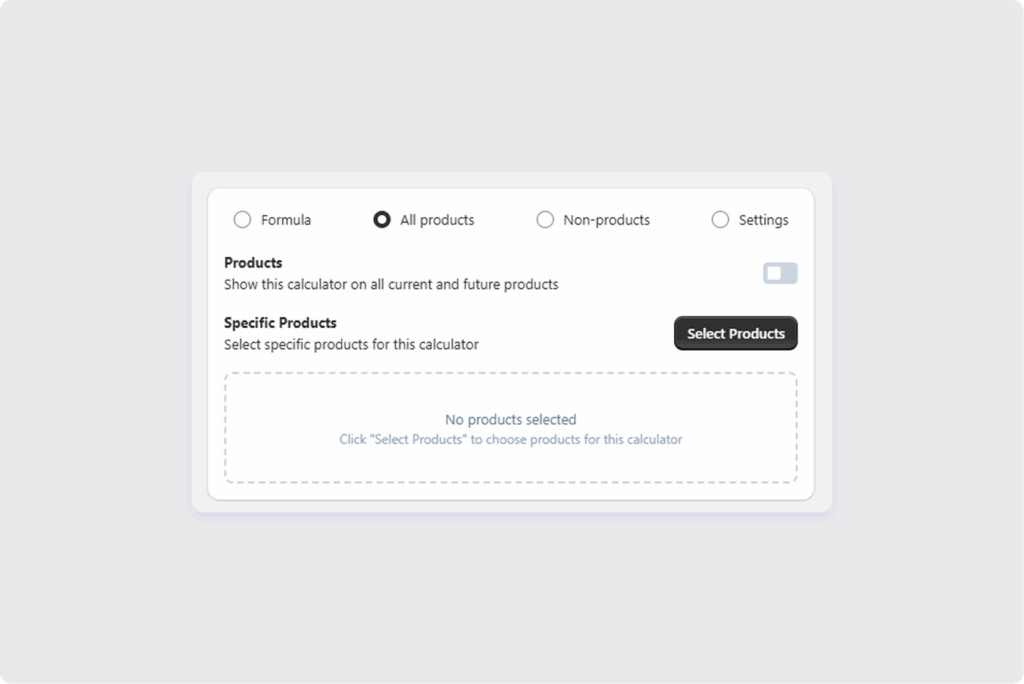
4. Attach and Test
Assign the calculator to your parent product and switch to your storefront.
- Test like a real customer: Do not just use the preview. Go to your live site, or a duplicate theme, enter weird dimensions like 0.1 or 9999, and see if the calculator handles it gracefully.
- Verify the Cart: Ensure the custom details show up clearly in the cart. If the customer cannot see their measurements at checkout, they will get nervous and abandon the purchase.
Common Pitfalls to Avoid
Even with the best tools, custom can get messy. Here is how to keep it professional:
- Avoid Invisible Logic: If you are charging extra for a premium finish, make sure the price updates live on the page. Customers hate surprise price jumps at the final click.
- Validate Your Inputs: If you cannot ship a banner wider than 120 inches, set a Maximum Value constraint in Apippa. Do not let a customer order something you cannot actually build.
- Fulfillment Language: Talk to your production team. Do they prefer measurements in CM or Inches? Set your calculator labels to match their workflow to avoid translation errors in the warehouse.
Troubleshooting and FAQ
Why is my price not updating?
Check if your pricing rule is actually linked to the input fields. If you renamed a field, such as from Width to Total Width, you may need to update the formula to recognize the new name.
Will these custom details show up in my 3P fulfillment app?
Yes. Because these are saved as Line-Item Properties, they are standard Shopify data points that almost every shipping and fulfillment app can read and print on packing slips.
What happens to abandoned carts?
In the No-Variant flow, abandoned carts are much more stable. Since the item in the cart is the Parent Product, the link will not break even if you update the calculator logic later.
Can I still charge for weight?
Since no new variants are created, the product uses the weight of the parent. If your shipping is based on weight and it varies wildly, you may need to use a shipping app that calculates rates based on the line-item properties.
The Bottom Line
The most successful Shopify stores are not the ones with the most variants; they are the ones with the cleanest data. By moving your custom pricing into Line-Item Properties via Apippa, you are building a store that is scalable, fast, and, most importantly, easy for your customers to use.
Would you like me to help you draft a specific pricing formula for one of your products to get you started?